Zero to Sixty, Part I
Plotting Your Novel on Sixty Index Cards or Fewer
Buckle up, winners: Today’s Shelf Life has photos. That’s right, I got out the light box for you—and I don’t get out the light box for just anybody. I have to tell you a secret: I don’t lose anything else in this life with the frequency I lose the power supply to the light box. I get the light box out to use it and 100 percent of the time the power supply is missing. When I finally find it, and use the light box and put the light box away again, I put the power supply away with it. But the next time I get the light box out the power supply is gone. I don’t know why this keeps happening to me. But anyway this is why I don’t get the lightbox out for just anybody.
I always want to test new writing tricks and techniques that could make my writing life easier. Not just to benefit myself, of course, but also so I can write about them here—for you. I finally had a chance to try out a new tactic for plotting I’d been eyeballing for a while. If you’re a pantser—someone who writes by the seat of their pants without planning ahead much or at all—you might not find this system particularly appealing. Or maybe you will, maybe there are parts of it you’ll be able to adapt to your style. But for the plotters (those who plan their writing ahead) and plantsers (a mix of plotter and pantser), I think you will dig this.
The other day in The Toddler Technique, I wrote about how to develop a plot from something as simple as an image, concept, or scene. Let’s say you’ve done that and developed your complete plot, and you’ve mapped all the major plot points from beginning to end. Good for you. Now you’ve got that all figured out, all the whys and wherefores, the next step in planning (not to say you can’t skip right to drafting from here, because you certainly can) is to figure out all the scenes you will need to move all your characters through the plot and tell your story.
I’ve tried many methods of mapping out the scenes of a novel, but today we’re talking about index cards. Good old three-by-five cards. Record cards, if you’re in the United Kingdom. Or fiche cards if you’re in Puerto Rico, according to my partner. We can’t figure out why they’re called that. We’re sure it’s related to microfiche somehow (and, no, he’s not confusing them for microfiche cards that have the film squares embedded). It’s a mystery. We’ll never know.
Before we get down to brass tacks, let me warn you that this is a two-part article covering a four-step process. Today’s Shelf Life includes the preparation and Step 1. The rest of the steps will be in Thursday’s Part II. I decided to break where I did because Step 1 is huge and if you decide to sit down and do it, you’ll have some time to work on it while you wait for the next shelfstallment to guide you on where to go next.
For today’s exercise (and Thursday’s) I got ahold of the following supplies at my local office supply store for less than $10.00:
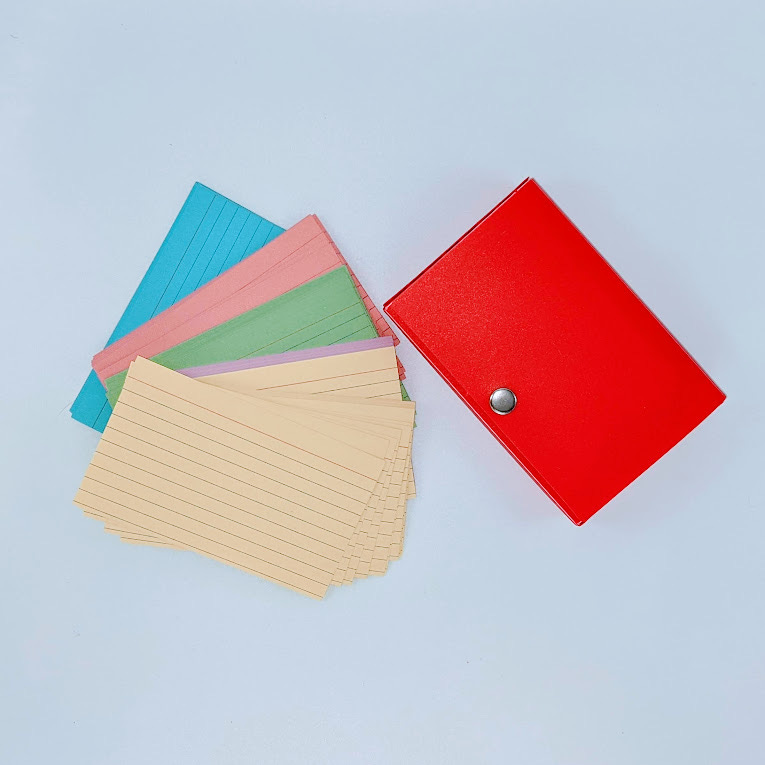
An index card case that holds up to 100 index cards (mine was made by Tru Red and was on sale for $1).
Index cards; I got a 300-pack of multicolored ones but you don’t need that many. Many colors or all one color or all white; lined, blank, or with grid squares; any of these are fine—it’s up to your personal preference.
I also had the following stuff already around my house that I used for this:
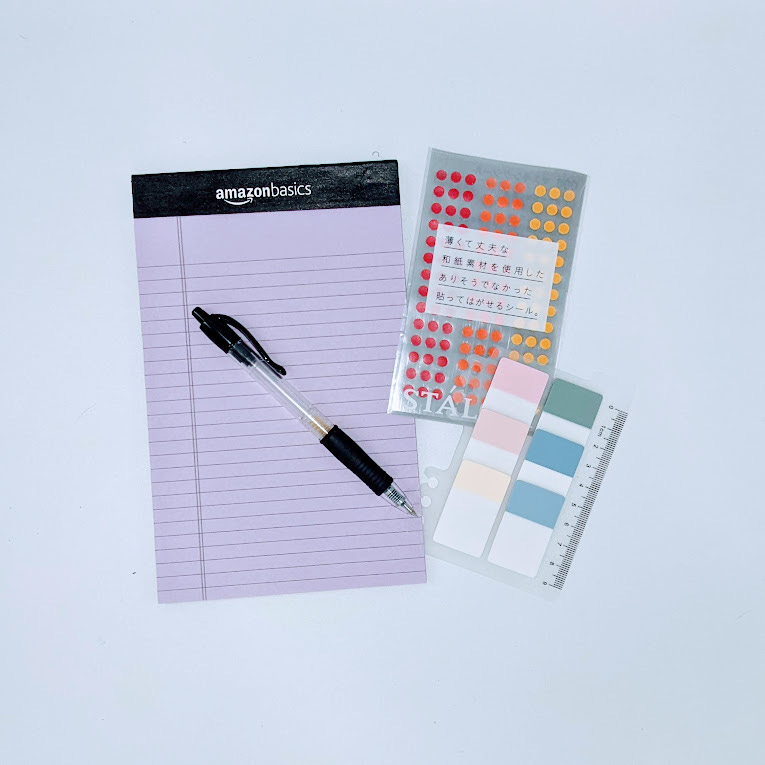
A pen (a black gel ink Pilot G2, obviously)
Dot stickers in several colors (a few markers would do just fine)
Sticky tabs, flags, or small Post-It notes
A notepad or other scratch paper for recording notes
The first thing I did was take sixty index cards out of my 300-pack. These are the cards I’m going to use for this project. It’s okay if I don’t use them all, and it’s fine if I need to go back to the stack and grab some more, but sixty is the number I’m initially hoping to use.
There’s a lot of different available wisdom about how many scenes a novel should have, but before we get into that let’s make sure we’re all on the same page about what, exactly, is a scene. A scene is a sequence of continuous action that takes place in one location and at one time, without a break. Every scene should have a beginning state and an end state that are different. Something has to change through the action of the scene: The plot moves forward or a character or character relationship develops. A character learns something they didn’t know before or changes in some way. A character moves closer to their goal through action or, through the introduction of an obstacle or setback, their goal is moved further our of their reach. A scene that doesn’t move the story forward is a scene destined for the editor’s red pen.
How many scenes should you have? The correct answer is, the number you need to tell your whole story with no unnecessary scenes included. If you want to narrow it down, think about how long a novel ought to be and how long a scene ought to be. This varies wildly depending on genre and audience. It also varies wildly depending on who you ask. I asked the internet (Google) and I got answers like “700 to 1000 words”; “1000 to 2000 words and 1500 words is ideal”; “300 to 1300 words”—it’s all over the place.
Realistically, scenes will be different lengths. Short scenes in rapid succession speed up the pace of your story, and longer scenes slow it down. You should include a mix of shorter and longer scenes. Plus, only you know how long you tend to write scenes. Some authors write longer scenes on average and some write shorter. How long should a novel be? Again, it depends—but if we’re talking about a salable debut, then probably 60,000 to 90,000 words depending on genre (longer for fantasy or historical fiction, shorter for MG, YA, and so on).
In short, there’s no correct number of scenes for a novel but we’re going to aim for a baseline of sixty in this exercise, which is why I pulled out sixty cards. I don’t need to use them all, I can add more if I need to, and most important: I don’t intend to use them all in the first round.
When I did this exercise, I laid each card out as I will describe in a moment. Now, your mileage may vary—there may be another layout that works better for you. It’s totally down to the type of story you’re writing and its details. But this is what I did.
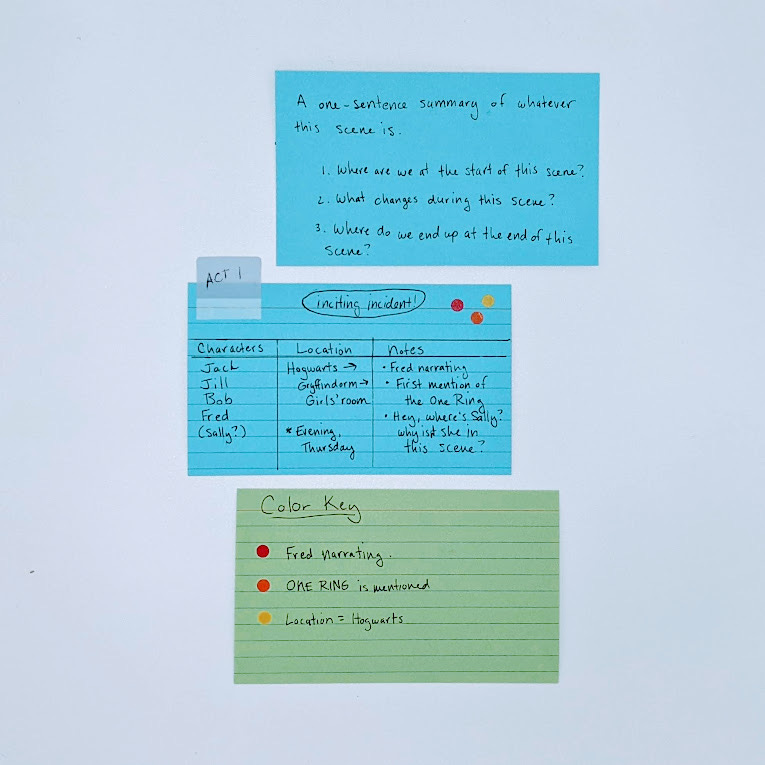
My cards are blank on one side and lined on the other. On the blank side, I used the top half for a one-sentence summary of the scene. The bottom half I labeled 1 (state at the start of the scene), 2 (action that causes the state to change), and 3 (state at end of scene). On the lined side of each card I left the top three lines blank and then below that I made three columns: Characters, Location, and Notes. I’m going to use that blank space at the top of this side later in the process to organize my scenes.
If your story has multiple narrators or point-of-view characters, that may be something you want to record on this side of the card in a column, or it might be something you want to color-code now or later. For example, if you have two point-of-view characters, Bob and Fred, you could color code Bob orange and Fred green. Any scene told from Bob’s point of view gets an orange dot and any scene told from Fred’s gets a green dot. The story I’m working on is told in two threads, the main plot taking place in the present-day and in a linear time frame and told by an third omniscient narrator and an embedded secondary story, told by a first-person narrator, which jumps around in time and fills in some backstory. I color-coded these with red and blue washi dots to track which scenes belong to which narrator.
Okay, now the fun part. Here comes the trite writing advice you get all the time:
Step 1: Write What You Know
Start by writing down all the scenes you already know about. Dump out your brain. Any scene you’ve envisioned or thought about, regardless of where it comes in the story, or what comes before or after, or how anyone got to that point—make a card for it. Start with the one-sentence summary and, if your mind is bursting with ideas, quickly move on to more cards. Don’t waste time filling in every detail of each card. Get down as many scenes as you can. While you’re doing this, more scenes will probably come to mind as you naturally think about how characters came to be places and doing things, and where they go after that. Keep writing those one-sentence summaries as fast as the ideas come to you.
When the well dries up and the ideas stop flowing so quickly, turn your attention to filling in the additional details for all the cards you just made. It’s okay if you don’t have every scene you need to tell the whole story—you probably won’t! There are supposed to be gaps at this stage. Don’t worry about it. Fill in the starting state, action/forward motion, and ending state of each scene on the front of each card and then flip it over.
In the left column, add all the characters who will be in that scene (if there are characters who might be there, just put them on the list with a question mark next to them). In the middle column, write down where the scene is taking place, from broadest to most specific: For instance, “Hogwarts, Gryffindor Dorm, Hermione’s Room.” Get a handful of layers in the location column as this will help you track which characters are close by each other and when. Then, in the third column, jot down any important notes about this scene. Is it the first appearance of a character, location, or important item? Leave some space in this column, because you’ll add to it later.
While you’re adding details to the cards, you’ll probably figure out some more scenes or at least identify some missing scenes: For example, “If [character] is in this scene but the last time I saw them they were in [location across the world], I need a scene to get them from there to here.” If you know what scene you need to fill the gap, create a new card. If you don’t, make a note on your scratch paper: “Must get [character] from [location] to [location] before [event].”
That’s it for Step 1. If you’re following along in real time, knock yourself out knocking out those cards and get as many scenes down as you can before Thursday’s Part II, which includes Steps 2, 3, and 4.
If you have questions that you'd like to see answered in Shelf Life, ideas for topics that you'd like to explore, or feedback on the newsletter, please feel free to contact me. I would love to hear from you.
For more information about who I am, what I do, and, most important, what my dog looks like, please visit my website.
After you have read a few posts, if you find that you're enjoying Shelf Life, please recommend it to your word-oriented friends.


